Development on the STM32H7
A few weeks ago I upgraded my STM32F7 discovery board to an STM32H7 Nucleo. Among others, a Nucleo board does not have an integrated LCD display. I want to use the STM32H7 on my custom board for my µmodular project. A few notes on development on a Mac, for my own future consultation and all my blog’s visitors ;)
- Use STM32CubeMX to generate the framework. Work in the designated “user code” area’s so you can update your framework (e.g. add new definitions for ADC, UART, etc.) through the Cube. I’m not working this way right now and have to update my codebase from a temporary second project which is just time consuming.
- Open a terminal with screen like this:
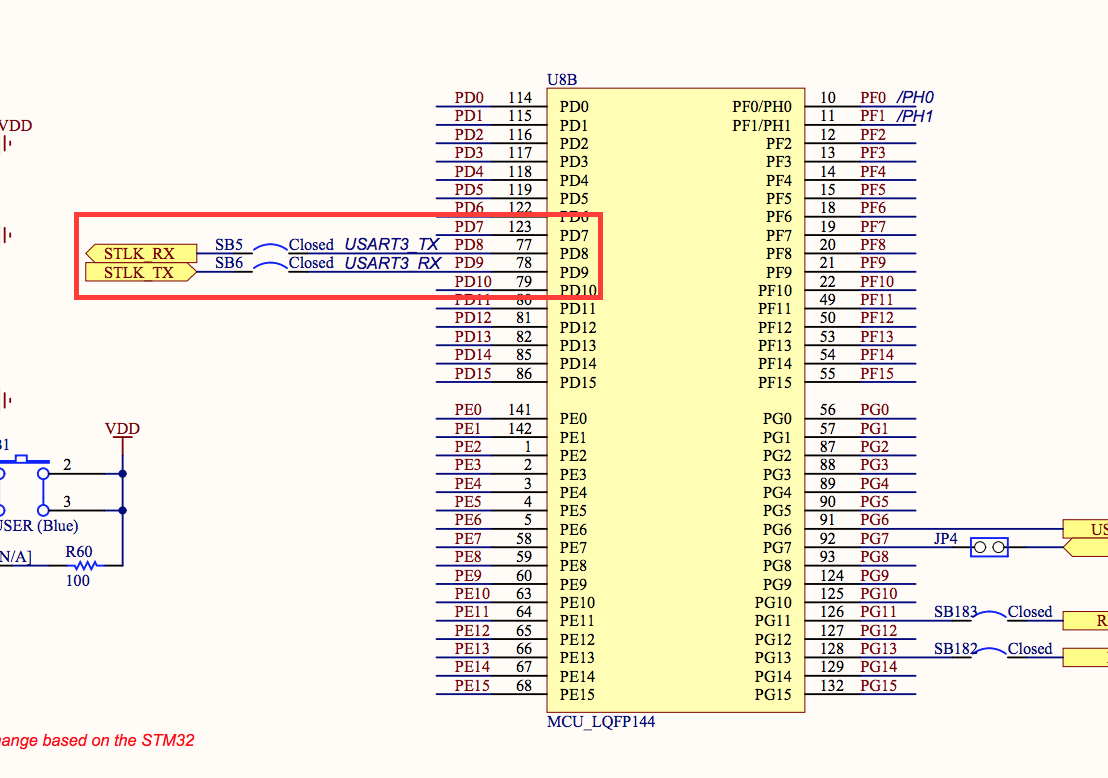
screen /dev/tty.usbmodem1413 115200,cs8,-parenb,-cstop,inlcr,onlret,echo. Send debug information through the UART that’s connected to the boards ST_LINK RX and TX. In the following image you’ll see that USART3 (PD8/PD9) on the STM32H7 Nucleo is connected to the ST_LINK RX and TX.

- To debug your running application install openocd HEAD with brew (
brew install open-ocd --HEAD) and run withopenocd -f board/st_nucleo_h743zi.cfgin a seperate terminal. Then, compile your application debug-style (-g -gdwarf-2 and -Og) and upload the .bin to your board. Usearm-none-eabi-gdb -eval-command="target extended-remote localhost:3333" build/stm32h7start.elfto start debugging your running app with gdb.
More to follow!